Every offshore spread runs better when the ballyhoo rigs are right. This article breaks down the three core rigging methods, swivel, O-ring, and floss, with exact hook sizes, wire gauges, brine times, and species-specific setup details for wahoo, mahi-mahi, and sailfish.
Featured
Building Ballyhoo Rigs for Offshore Trolling
If you spend any real time running offshore, you already know that ballyhoo are the workhorses of the trolling spread. From the Gulf Stream to Pacific blue water, from the Bahamas to Costa Rica, rigging ballyhoo properly is one of the most important practical skills you can develop as an offshore angler. On the surface it sounds simple, a small fish on a hook, but the difference between a bait that swims with lifelike action for hours and one that blows out on the first pass is entirely in the rigging.
I have watched new anglers drag poorly built ballyhoo rigs behind the boat while fish kept ignoring them. I have also watched those same anglers pay attention to a seasoned captain rig one up correctly, put it in the water, and get bit inside of thirty seconds. The bait matters. The rig matters more.
This article walks through every stage of the process: selecting quality ballyhoo, brining and preparing them correctly, building each major rig type from the ground up, and dialing in your presentation for specific target species. You will find specific hook sizes, wire gauges, trolling speeds, and technique details, not vague outlines. Whether you are running a wahoo spread at twelve knots or slow-trolling sailfish baits, what follows gives you a foundation built from actual offshore experience.
For the complete operational reference on ballyhoo selection, brining, the eight working rig families, and species matching, see trolling ballyhoo as offshore bait.
Why Ballyhoo Are the Most Effective Offshore Trolling Bait
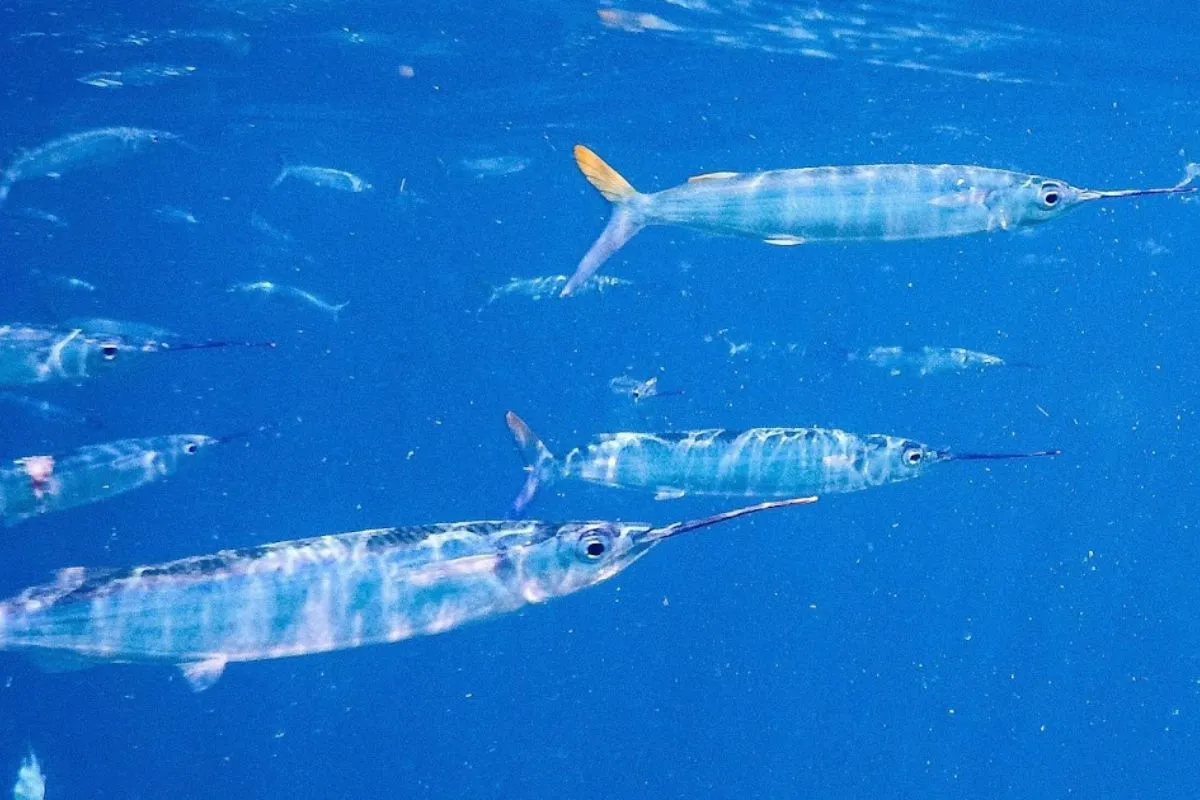
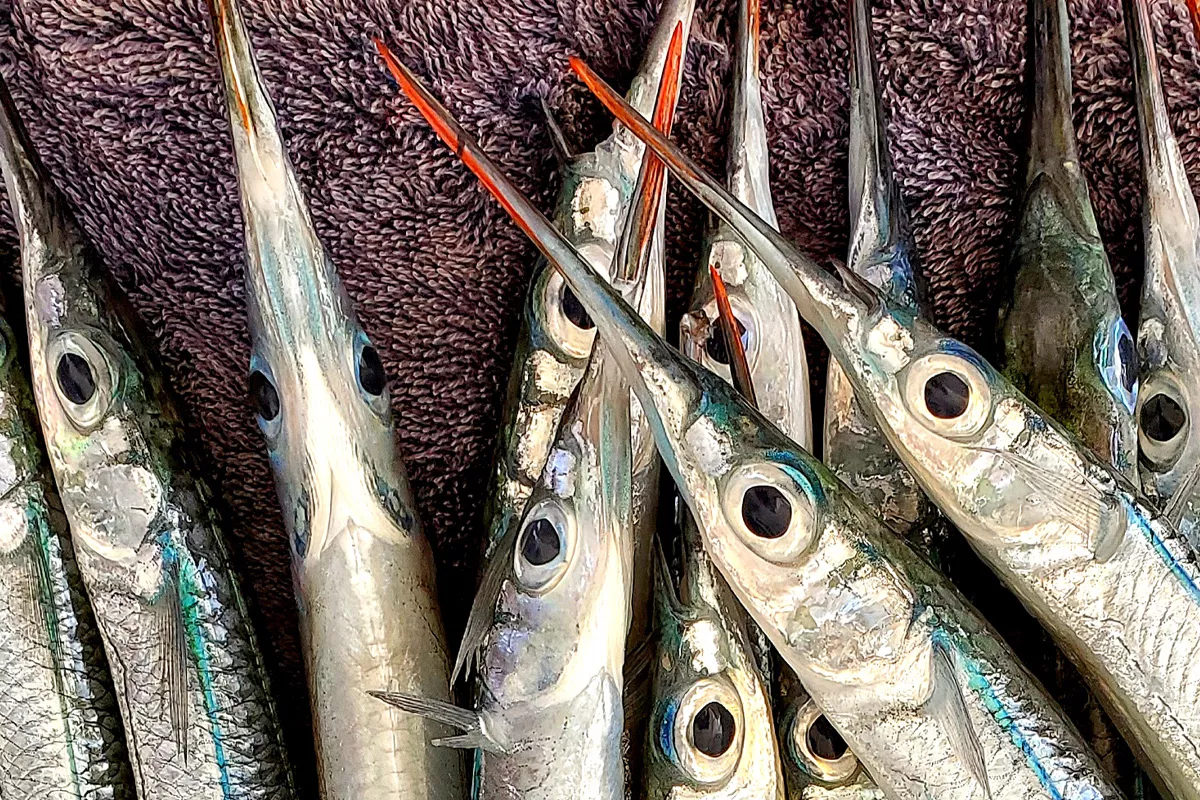
Ballyhoo (Hemiramphus brasiliensis) have a combination of physical characteristics that make them exceptional trolling baits. Their elongated, slender profile produces minimal drag in the water, which means they track clean and swim true even at higher speeds. Their coloring -- silver flanks, blue-green back, and that distinctive orange-tipped tail -- closely mimics the baitfish that pelagic predators hunt daily. And critically, a properly rigged ballyhoo will produce a lifelike wobbling action that triggers strikes even from fish that are not actively feeding.
Their versatility is also hard to overstate. You can rig them naked with wire and a hook, dress them in a skirt, run them under a chugger head, or slide them inside a sea witch. They work slow-trolled, high-speed trolled, and even pitched by hand to surface-feeding fish. Very few natural baits offer that range of application across so many pelagic species.
That versatility also means there is more than one right way to rig them. The correct method depends on your target species, trolling speed, sea conditions, and what the fish are responding to on a given day.
Choosing the Right Ballyhoo: Size, Freshness, and Condition
Before you pick up a rigging needle, you need quality bait. A poorly chosen ballyhoo will underperform no matter how well you rig it. This is the step that sets the ceiling on everything that follows.
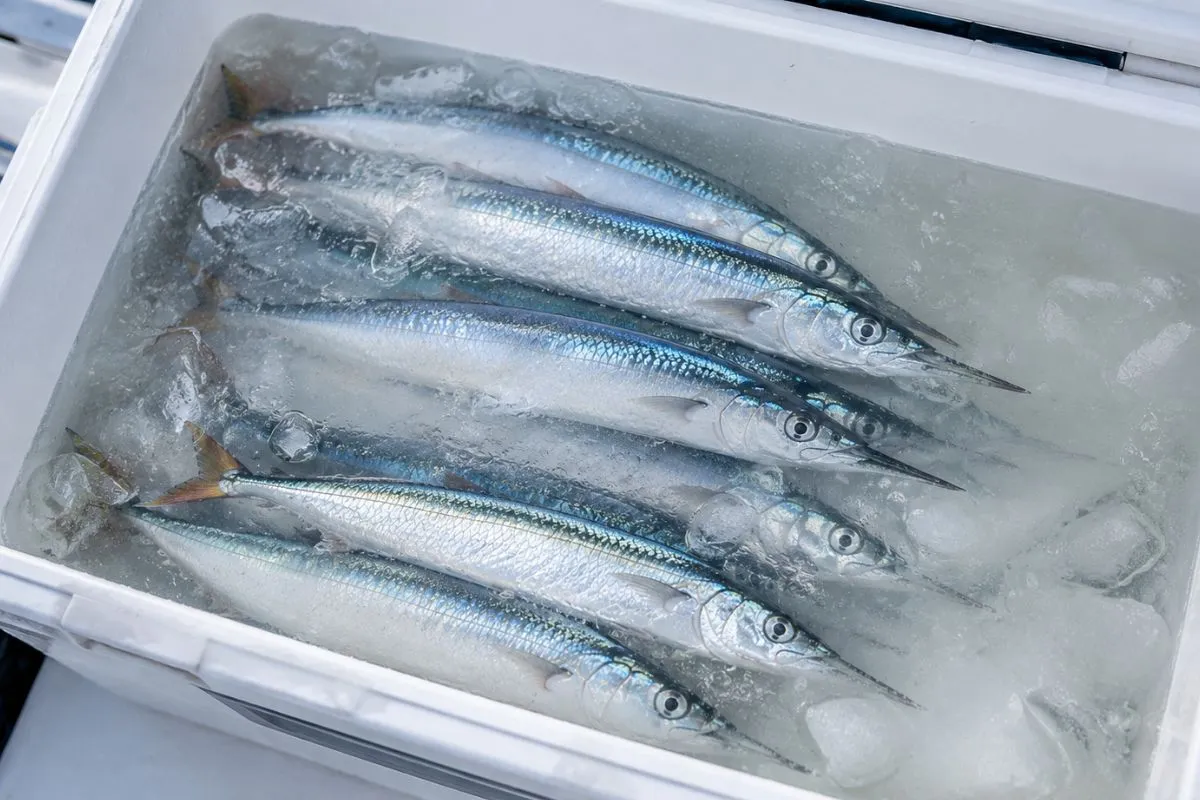
Selecting quality ballyhoo starts with color. Fresh or properly preserved ballyhoo display bright blue-green coloration on the back, silver flanks, and visible orange highlights on the tail fin. When that color has faded to a dull gray or the fish looks washed out and pale, leave it in the bin.
- Firmness: The belly should be firm to the touch, not mushy. A soft belly means the fish has begun to break down internally and will fall apart under trolling pressure, sometimes within minutes.
- Eye clarity: Eyes should be clear and slightly convex. Cloudy, sunken, or flat eyes signal age or rough handling since harvest.
- Beak condition: The beak must be intact. A broken beak makes wire rigging difficult and throws off the bait's swimming action, since the beak is the anchor point for every head wrap.
- Body integrity: Look for fish with no punctures, cuts, or torn flanks. Damaged skin exposes soft tissue that degrades quickly at trolling speed.
- Size match: Small ballyhoo (half-bead to full-bead) work well for sailfish and mahi on lighter tackle. Medium and large ballyhoo are standard for wahoo, blue marlin, and tuna spreads.
Brining Ballyhoo Before Rigging: The Step Most Anglers Skip
Proper preparation before rigging makes a significant difference in how long your bait stays together in the water, especially at higher trolling speeds. Brining ballyhoo firms up the flesh, reduces water absorption, and helps each bait maintain its shape and structural integrity under prolonged trolling pressure.
- Thaw frozen ballyhoo slowly in cold water. Never use warm water or leave them at room temperature -- rapid thawing breaks down the flesh faster and leaves you with soft, unusable bait.
- Mix a brine solution of one cup of non-iodized salt per gallon of cold water. Some captains add a tablespoon of menhaden oil or a commercial fish attractant to the brine for added scent appeal.
- Submerge the ballyhoo fully and soak for 30 to 60 minutes. For high-speed wahoo rigs that run at 8 to 12 knots, extend the soak to 90 minutes or two hours.
- Remove from brine, pat dry with a clean rag, and keep on ice or in a refrigerated bait cooler until you are ready to rig.
- Rig with dry hands and dry bait. Wire grips better, floss wraps tighter, and the finished rig holds longer on a surface that is not slick with moisture.
A properly brined ballyhoo stays together at speeds where a soft, un-brined bait blows apart in the first few minutes. This is a non-negotiable step when you are running a wahoo spread.
Tools You Need at the Rigging Station
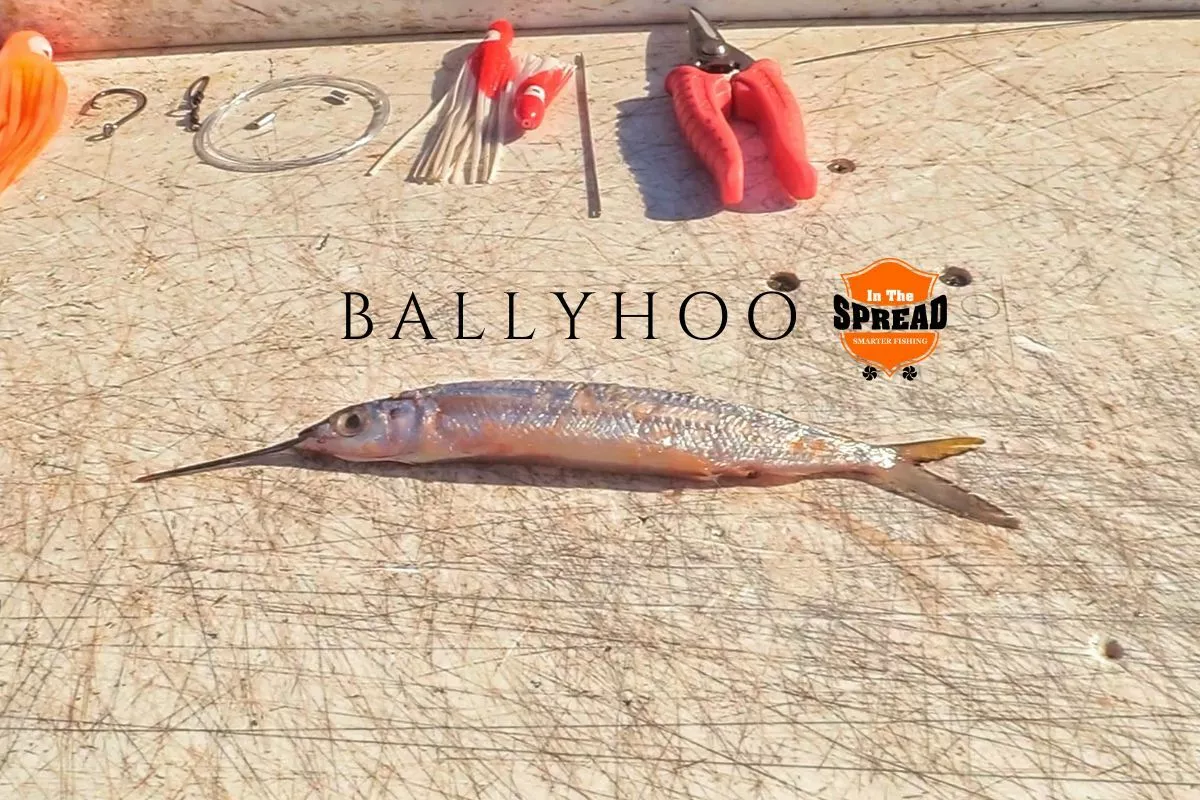
Rigging ballyhoo efficiently means having everything organized before you start. Scrambling for a crimper while holding a half-finished bait wastes time and frays nerves. Here is what belongs at a properly set rigging station:
- Closed-eye rigging needle: 6 to 8 inch length for threading floss or light wire through the bait. Stainless steel resists corrosion.
- Rigging wire: Single-strand #5 or #6 stainless wire for standard rigs; #9 single-strand or 174-strand stainless cable for wahoo-specific wire rigs.
- Hooks: J-hooks in sizes 5/0 through 10/0 depending on bait size and target species; circle hooks in 6/0 to 9/0 for catch-and-release billfish applications.
- Barrel swivels: Size 5 to 7 barrel swivels for swivel rigs. The swivel prevents leader twist from transferring to the bait at high trolling speeds.
- O-rings: Appropriately sized rubber O-rings for the O-ring rig method. Stock several sizes to match varying bait head diameters.
- Leader material: 60 to 100 lb monofilament or fluorocarbon for standard species; heavier wire for wahoo leaders.
- Waxed rigging floss: Waxed dental floss or purpose-made rigging thread for floss rigs. Waxed versions grip better and resist moisture.
- Crimping sleeves and hand crimper: For clean, secure leader connections.
- Bait knife: A sharp, narrow-bladed knife for trimming and any deboning work.
- Needle nose pliers and wire cutters: For forming and trimming wire.
- Deboning tool or fiberglass arrow: A commercial deboner or a 3/8-inch fiberglass arrow shaft for removing the backbone when needed.
Keep hooks sorted by size in separate compartments. Pre-cut your wire to working lengths of 12 to 18 inches for standard head wraps. When possible, pre-rig your leaders with swivels before you head offshore so the rigging station work is limited to the bait itself.
Rigging Ballyhoo with the Swivel Rig
The swivel rig is the most common ballyhoo rig for high-speed trolling, and it is the standard choice when targeting wahoo and tuna. A barrel swivel positioned between the hook shank and the leader prevents the bait from twisting the leader at speed. Without it, even a well-wrapped bait can spin at 10 knots and turn your leader into a corkscrew within minutes.
Here is how to build a proper swivel rig:
Step 2 -- Attach the swivel. Slide a size 6 barrel swivel onto a 12 to 14-inch piece of #6 haywire wire. Form a tight haywire twist at one end of the wire to lock the swivel. Pass the opposite end of the wire through one gill plate and out through the eye socket on the far side.
Step 3 -- Wrap the beak. Pull the wire snug against the gill plate, then begin wrapping tightly around the beak, moving from the head toward the bill tip. Keep wraps flush against each other -- four to six tight, even wraps with no gaps or overlapping at odd angles.
Step 4 -- Finish the wrap. Execute a barrel roll to lock the wire, then snip any excess clean. The beak should be firm and compressed under the wrap, not split or bent.
Step 5 -- Set hook angle. Rotate the hook so the point rides up or slightly to the side. A hook point buried against the belly dramatically reduces hookup rate.
At 8 to 12 knots, a correctly built swivel rig tracks straight and holds together for extended trolling runs. If a bait starts spinning, the fix is almost always in the head wrap -- look for uneven wraps or a hook shank that has rotated off the belly midline.
Ballyhoo Bait Rigging Courses
Ballyhoo represents natural forage for offshore predators, but improper rigging destroys the swimming action that triggers strikes from sailfish and marlin. Success depends on harness stitching technique, hook placement, and component selection that maintains bait integrity and natural presentation throughout trolling passes in rough seas and at varying speeds.
Ballyhoo rigging variations serve specific offshore applications rather than being interchangeable methods producing identical results. Mike Tarmey and RJ Boyle explain eight rigging techniques addressing different trolling speeds, target species preferences, sea conditions, and whether natural presentation or dressed configurations with skirts and teasers improve strike rates in your specific fishing scenario.

Wire and fluorocarbon leader choices for slow-trolling ballyhoo affect wahoo hookup rates through preventing teeth cuts versus reduced visibility triggering selective fish. Gore Offshore rig systems simplify ballyhoo preparation through pre-made components, requiring proper threading, hook positioning, and securing methods maintaining natural profiles and swimming action throughout trolling sessions at reduced speeds.
Rigging Ballyhoo with the O-Ring Rig
The O-ring rig is a versatile technique that performs well at medium trolling speeds in the 6 to 9-knot range and produces excellent natural bait action. The O-ring creates a mechanical anchor point for the wire wrap that does not rely solely on beak pressure, which makes it a stronger option for larger ballyhoo where a beak wrap alone may not hold under sustained trolling load.
- Slide an appropriately sized rubber O-ring over the ballyhoo's bill and push it back to sit at the base of the beak where it meets the head. The ring should fit snugly without deforming the beak.
- Position your hook through the eye socket on one side, exiting through the opposite eye. The hook shank should lay flat and straight along the belly.
- Thread a piece of #5 haywire wire through the O-ring, pass it through one gill plate, and draw it through the other.
- Wrap the wire around the beak ahead of the O-ring, making four to five tight wraps moving toward the bill tip, then draw the wire back toward the ring.
- Tuck the wire tag end under the O-ring to lock it, execute a barrel roll, and clip the excess.
The O-ring rig is particularly well-suited for running skirted ballyhoo since the O-ring gives the skirt head a clean, flush mounting point. The bait tracks naturally and the skirt sits without hardware interference. For a comprehensive look at all the ways ballyhoo can be rigged for an offshore spread, Ballyhoo Bait Rigging 8 Ways for Offshore Fishing covers every configuration in detail.
Rigging Ballyhoo with the Floss Rig
The floss rig produces the most natural presentation of the three primary techniques. With no wire hardware visible at the head, the bait looks completely unencumbered and swims with maximum lifelike action. Floss rigs are the preferred choice among sailfish and mahi-mahi captains where presentation is critical and trolling speeds stay moderate.
Here is how to build the floss rig from scratch:
Step 1 -- Hook selection and placement. Use a 5/0 to 6/0 J-hook for medium ballyhoo, stepping up to a 7/0 for larger fish. Insert the hook through the lower jaw and out through the top of the beak, or pass it through the eye socket depending on your preferred hook angle for the target species.
Step 2 -- Thread the needle. Thread a 24-inch length of waxed rigging floss through the eye of a closed-eye rigging needle.Step 3 -- Pass the needle through the beak. Push the needle through the beak just behind the bill tip, threading the floss through the bait from side to side.
Step 4 -- Begin wrapping. Hold the hook shank pressed flat against the ballyhoo's belly. Wrap the floss tightly around the beak starting near the head and working toward the bill tip, overlapping each wrap by roughly half its width. Keep steady, even tension on every pass.
Step 5 -- Make 10 to 12 wraps. Continue toward the bill tip with consistent pressure. The beak should compress slightly under the wraps but not split.
Step 6 -- Lock the wrap. Pull the tag end tight against the final wrap, tie two half-hitches around the entire wrap, and trim excess floss flush.
The finished rig should feel completely solid when you apply light tension to the hook. Any give in the wrap means you need more turns before finishing. A properly built floss rig holds together at 7 to 8 knots without breaking down, making it the right tool for sailfish, mahi, and any application where natural presentation takes priority over speed.
For more on rigging ballyhoo as trolling baits across different spread configurations, that resource goes deeper on deployment.
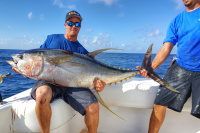
Rigging Ballyhoo for Wahoo
Rigging ballyhoo for wahoo requires one critical modification that separates it from every other application: heavy wire. Wahoo have some of the sharpest teeth in the ocean. They will cut through 100 lb fluorocarbon on a clean strike, often leaving you with no sign the fish was ever there. Wire is not optional.
The wahoo wire rig builds on the swivel rig foundation with these specific adjustments:
- Bite leader: Use single-strand #9 stainless wire (approximately 175 lb breaking strength) or a short section of 174-strand stainless cable. Keep the wire bite section 12 to 18 inches long -- long enough to cover the area a wahoo will strike, short enough to preserve natural bait movement.
- Hook size: A 8/0 to 10/0 J-hook on large ballyhoo. Consider building a double-hook pin rig with a trailing stinger hook in the tail section for fish known to short-strike, which is common with wahoo at high speed.
- Trolling speed: Run wahoo ballyhoo rigs at 8 to 12 knots. Brine your bait for at least 60 to 90 minutes before rigging -- at those speeds, a soft bait does not survive long enough to get a bite.
- Skirt selection: Dark blue and purple, pink and white, and black and purple combinations produce consistently for wahoo. The skirt protects the head wrap from wave impact at speed and adds the visual attractor profile that triggers high-speed strikes.
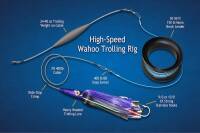
For a comprehensive breakdown of wahoo leader construction covering both bait and lure applications, Building Wahoo Leader Systems for Trolling and Bait covers every component and connection method used by experienced wahoo captains. The High Speed Wahoo Trolling Rig article addresses lure combinations and spread positioning for dedicated wahoo fishing.
Rigging Ballyhoo for Mahi-Mahi
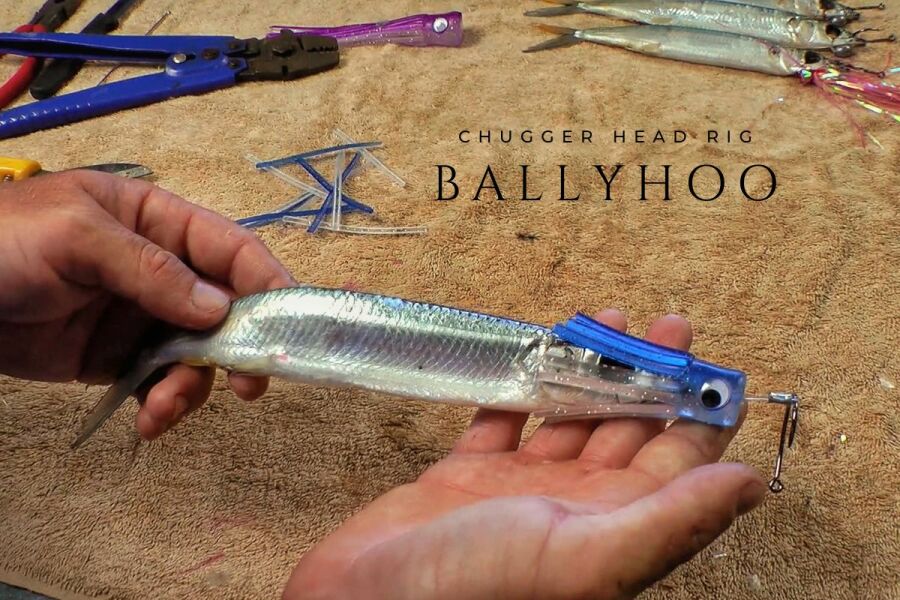
Mahi-mahi (dorado) are aggressive, visually-oriented predators that respond strongly to color, flash, and surface commotion in the spread. Rigging ballyhoo for mahi works best with a chugger head or mylar skirt that creates bubble trails and reflective flash, giving the bait an attractor profile that draws fish up from below.
The chugger head rig is the standard for dedicated mahi fishing:
- Slide a small to medium chugger head (2 to 3 inch cup face) onto the leader before attaching the hook.
- Rig the ballyhoo using either the O-ring or floss method. Both produce natural swimming action at mahi trolling speeds.
- Position the chugger so the concave cup face sits flush against the ballyhoo's bill and faces forward into the water flow.
- Troll at 6 to 8 knots. Mahi will come up from depth to investigate the bubble trail and visual disturbance, then commit on the bait below the surface.
Bright, contrasting colors produce well for mahi: chartreuse and white, pink and purple, blue and white. In clear blue water with good sun, go brighter. In slightly green or off-color water, darker combinations with purple or black often outperform the flashy options. Mylar adds intense reflective flash on sunny days and can make a significant difference when fish are keyed on baitfish schooling below the surface.
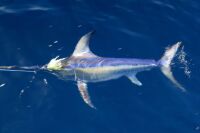
Rigging Ballyhoo for Sailfish
Sailfish are sight feeders and bill hunters. They use their bill to stun prey before turning to eat it, which means hookup rate on sailfish is as much about hook position as it is about rig style. Rigging ballyhoo for sailfish typically uses the floss rig paired with a circle hook for tournament and catch-and-release fishing, or a J-hook for general trolling presentations.
- Bait size: Use small to medium ballyhoo. Match the bait profile to what sails are actively feeding on in your area. A small, lively-swimming bait almost always outperforms a large, heavy one for sailfish.
- Hook choice: A 5/0 to 6/0 circle hook positioned at the corner of the lower jaw gives the best hookup angle on a billfish that swipes and turns. Circle hooks reduce deep hooking significantly for released fish.
- Trolling speed: Sailfish baits run slow -- 4 to 7 knots. At those speeds, natural swimming action matters far more than hardware choices. This is where the floss rig earns its reputation.
- Skip baits: Skipping a ballyhoo across the surface behind a teaser or in a daisy chain configuration is extremely effective when sails are working the surface. The skip bait creates commotion without a skirt, giving the fish a clean, natural presentation to commit on.
Adding Skirts to Your Ballyhoo Rig
Skirts serve a functional purpose that goes well beyond aesthetics. A properly fitted skirt protects the ballyhoo's head wrap from wave action and spray, adds flash and color that attract fish from greater distances, and can materially change the bait's swimming profile in the water column.
- Sea witch: The flowing, multi-strand sea witch adds color and fluid movement without creating significant drag. It works across a wide speed range and is particularly effective for marlin and sailfish.
- Mylar skirts: Reflective mylar generates intense, directional flash in bright sunlight. Pair mylar with deep blue water and clear conditions for maximum effect.
- Squid skirts: Simulate the action of a fleeing squid with trailing tentacle motion. Effective for tuna and mahi-mahi that regularly target squid as a primary food source.
- Chugger heads with skirts: The combination of water displacement from the chugger cup and the trailing skirt creates maximum visual commotion and draws fish from significant depth.
Skirt length matters. A skirt that extends beyond the ballyhoo's tail creates a soft, flowing profile that suggests a larger bait. A shorter skirt ending near the pectoral fins shows more of the natural bait and works better when fish are actively keyed on ballyhoo specifically. Color selection by condition: clear blue water in bright sun calls for silver, blue, or chartreuse with mylar; overcast or green water responds better to pink, purple, or dark combinations; low-light conditions early and late in the day favor glow or reflective materials.
Solving the Most Common Ballyhoo Rigging Problems
Even experienced anglers run into problems with ballyhoo rigs. Understanding why a rig fails is how you fix it faster on the water.
Bait spinning at trolling speed is almost always a wire wrap problem. Either the wraps are uneven -- more tension on one side of the beak than the other -- or the hook shank has rotated off the belly midline. A hook that is even slightly off-center acts as a rudder and sends the bait into a spin. Pull the rig, rebuild the head wrap with even, symmetric tension, and confirm the hook shank sits flush along the centerline before re-deploying.
Bait blowing out too quickly almost always traces to inadequate brining or starting with a bait that was structurally too soft to begin with. At speeds above 8 knots, an under-brined ballyhoo loses its head wrap and falls apart within minutes. If one bait in your spread keeps blowing out while others hold, replace it rather than rebuilding the same weak bait repeatedly.
Short strikes without hookups happen when wahoo or other fish are hitting the tail section rather than committing to the head. This is common on high-speed wahoo strikes. A double-hook pin rig with a trailing stinger hook positioned in the midsection to tail area addresses this directly. The trailing hook catches fish that hit short without interfering with normal strikes.
Frequently Asked Questions About Rigging Ballyhoo
What hook size should I use for rigging ballyhoo?
Hook size scales with bait size and target species. For small ballyhoo targeting sailfish or smaller mahi-mahi, a 5/0 to 6/0 J-hook or circle hook is standard. Medium ballyhoo for mahi-mahi typically uses a 6/0 to 7/0. Large ballyhoo rigged for wahoo or blue marlin calls for 8/0 to 10/0. When in doubt, size up slightly -- a hook that is marginally large for the bait is better than a hook too small for the fish.
What is the difference between the swivel rig, O-ring rig, and floss rig?
The swivel rig uses a barrel swivel between the hook and leader with a wire head wrap, and is the best choice for high-speed trolling above 8 knots because it prevents leader twist. The O-ring rig uses a rubber O-ring as the primary anchor point for the wire wrap, offering a secure connection well-suited for medium speeds and skirted presentations. The floss rig eliminates wire hardware entirely, using waxed thread to secure the hook to the bait, producing the most natural presentation at slow to moderate trolling speeds where sailfish and mahi are the target.
How do I keep a rigged ballyhoo from spinning at trolling speed?
Spinning is caused by an uneven head wrap, misaligned hook, or both. Your wire wraps must be perfectly even in tension on all sides of the beak -- any asymmetry acts as a rudder. The hook shank must run straight down the belly midline, not rotated to either side. Adding a barrel swivel between hook and leader also prevents leader twist from transferring back to the bait and amplifying any existing alignment issue.
How long should I brine ballyhoo before rigging?
For general offshore trolling at moderate speeds, 30 to 60 minutes in cold salt brine (one cup non-iodized salt per gallon of water) is sufficient. For high-speed wahoo rigs running at 8 to 12 knots, extend the soak to 90 minutes or two full hours. The firmer the bait, the longer the rig runs without blowing out.
Can I rig ballyhoo without a rigging needle?
Wire rigs can be built without a needle since single-strand wire is stiff enough to thread through the gill plate and eye socket manually. However, a closed-eye rigging needle is essential for floss rigs -- there is no practical way to thread multiple wraps of waxed floss through a ballyhoo beak without one. A basic stainless rigging needle is inexpensive and one of the highest-utility tools at any offshore rigging station.
What skirt colors work best for wahoo, mahi-mahi, and sailfish?
For wahoo, dark blue and purple, pink and white, and black and purple consistently produce at high-speed trolling depths. For mahi-mahi, chartreuse, yellow, and orange attract fish that key on bright, contrasting colors visible from depth. For sailfish, blue and white or pink and white skirts in combination with a sea witch work well across most conditions. For tuna, match skirt color to local forage when possible -- green and silver performs in areas with heavy mackerel or sardine populations.
Should I use circle hooks or J-hooks for ballyhoo rigging?
For catch-and-release billfish fishing, circle hooks are strongly preferred. They dramatically reduce deep hooking and improve post-release survival rates on sailfish and marlin. A 6/0 circle hook at the corner of the lower jaw is the standard tournament setup. For general trolling where hookup rate is the priority and you are retaining fish, J-hooks provide a more positive strike-to-hookup ratio. Many offshore captains run a mixed spread -- circle hooks on flat lines and J-hooks in rigger positions.
How do I rig ballyhoo for a skip bait presentation?
Skip bait rigging uses a standard floss or wire rig, but the hook position is adjusted so the belly hook point rides at a slightly upward angle relative to the bait's natural swimming posture. The beak is left untrimmed so the bait catches water and skips across the surface. Skip baits work best at 4 to 7 knots and are most effective in daisy chains or behind a surface teaser for sailfish and marlin. The key is keeping the rig light -- minimal hardware lets the bait respond naturally to wave action.
The Payoff of Getting Ballyhoo Rigging Right
Rigging ballyhoo is a skill that compounds with time and repetition. The first few rigs you build might take ten minutes each. After a full season of offshore fishing, you are turning out clean, functional rigs in two minutes, which means more time with lines in the water and less time at the rigging station while fish move through.
The bigger picture is understanding why each component of a rig does what it does. A barrel swivel prevents leader twist. A wire head wrap anchors the bait under hydrodynamic pressure. Brining firms the flesh so the bait survives trolling. Hook position determines the hookup angle when a fish commits. When you understand the function of each element, you stop following a recipe by rote and start actually rigging -- adjusting your approach to sea conditions, trolling speed, and target species rather than defaulting to one method regardless of what the situation calls for.
The captains who teach bait rigging courses at In The Spread have spent careers refining these techniques on the water. The specific details they share -- exact wire gauges for wahoo, number of floss wraps for sailfish, hook angle adjustments for circle hooks on billfish -- are the kind of knowledge that takes years to accumulate through trial and error. Getting direct access to that experience shortens your learning curve significantly.
If you are building out your offshore fishing education, the Bait Rigging video section at In The Spread covers far more than ballyhoo -- from live bait rigging to artificial presentations, taught by the working captains who fish these methods for a living.
Login
to leave a review.
User Reviews
There are no reviews yet.
Complete Dredge Pulley Setup Guide
Saltwater
12.28.2020
High Speed Wahoo Trolling Rig
Saltwater
09.08.2018
Fishing Light Tackle for Yellowfin Tuna
Saltwater
09.08.2018


Fishing Gulf of Mexico Inshore Waters
Saltwater
11.28.2023
0